INSTRUCTIONS:
- Preheat oven to 375°F (190°C). Line bottoms of 2 (8-inch) round cake pans with parchment paper.
- In the heatproof bowl of a stand mixer or in a medium heatproof bowl, whisk together eggs and sugar.Place bowl over a saucepan of simmering water. Cook, whisking occasionally, until an instant-read thermometer registers 110°F (43°C).
- Carefully move to stand mixer. Using the whisk attachment, beat at high speed until thick, tripled in volume, and ribbon-consistency, 3 to 4 minutes.
- Gently sift together flour, cornstarch, baking powder, and salt over egg mixture, and gently fold just until combined. Transfer 1 cup (75 grams) batter to a small bowl, and stir in melted butter and vanilla until combined.
- Fold butter mixture into remaining batter just until combined. Divide batter between prepared pans (about 3⅓ cups or 265 grams each).
- Bake until golden and cake springs back when lightly pressed, 15 to 20 minutes. Let cool completely in pans on a wire rack.
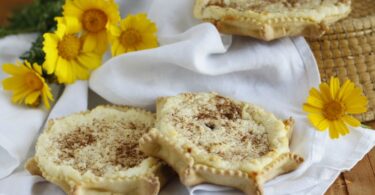
- Run a thin-bladed knife along edge of cake layers, and remove from pans. Place 1 cake layer on a serving plate, and spread ¼ cup (53 grams) Chocolate Condensed Milk Buttercream on top. Top with Hazelnut Meringue round layer. Spread ¼ cup (53 grams) buttercream on top of remaining cake layer, and place, buttercream side down, on top of meringue layer. Spread remaining buttercream on top and sides of cake as desired.Refrigerate for at least 30 minutes before serving.
- When ready to serve, garnish with hazelnuts and Hazelnut Meringue kisses, if desired. Best served same day.
Chocolate Condensed Milk Buttercream:
1. In the bowl of a stand mixer fitted with the whisk attachment, beat butter and vanilla at low speed until smooth. Slowly increase mixer speed to medium-high, and beat until pale and fluffy, 3 to 4 minutes. With mixer on low speed, gradually add cocoa, beating until just combined and stopping to scrape sides of bowl. With mixer on low speed, add condensed milk in small increments. Increase mixer speed to medium, and beat until thick enough to hold stiff peaks, 2 to 3 minutes. (If buttercream is too loose to use, cover and refrigerate for 20 minutes and then rewhip.) Use immediately.
Hazelnut Meringue:
- Preheat oven to 300°F (150°C). Line bottom of an 8-inch round cake pan with parchment paper. Line sides of pan with a strip of parchment paper.
- Line a small baking sheet with parchment paper.
- In the heatproof bowl of a stand mixer or in a medium heatproof bowl, whisk together sugar, egg whites, and salt by hand. Place bowl over a saucepan of simmering water. Cook, whisking gently and frequently, until sugar completely dissolves and an instant-read thermometer registers 120°F (49°C) to 130°F (54°C).
- Carefully move to stand mixer. Using the whisk attachment, beat at medium-high speed until stiff peaks form, 4 to 5 minutes.
- In a small bowl, stir together cornstarch and vinegar. Add cornstarch mixture to meringue, and beat at medium-high speed until incorporated, about 30 seconds.
- Spoon ⅓ cup (25 grams) meringue into a pastry bag fitted with a medium French star piping tip (Ateco #864). Holding tip perpendicular to parchment paper, pipe meringue kisses of varied sizes at least ½ inch apart on prepared baking sheet. Set aside.
- Fold hazelnuts into remaining meringue. Spoon into prepared cake pan, leveling with an offset spatula.
- Bake round meringue layer by itself for 30 minutes. Place kisses in oven, and reduce oven temperature to 225°F (105°C). Continue to bake both the round meringue layer and the kisses until dry to the touch, 40 to 55 minutes more. Turn oven off; let meringues stand in oven with door closed for at least 8 hours or up to overnight
MAKING MERINGUE MAGIC:
Our recipe uses the Swiss technique for creating an incredibly stable and majestic meringue
Preheat oven to 300°F (150°C). Line bottom of an 8-inch round cake pan with parchment paper. Line sides of pan with a strip of parchment paper. (See Note.) Line a small baking sheet with parchment paper.
In the heatproof bowl of a stand mixer or in a medium heatproof bowl, whisk together sugar, egg whites, and salt by hand. Place bowl over a saucepan of simmering water. Cook, whisking gently and frequently, until sugar completely dissolves and an instant-read thermometer registers 120°F (49°C) to 130°F (54°C).
MAKING THE CAKE LAYERS
1. Preheat oven to 375°F (190°C). Line bottoms of 2 (8-inch) round cake pans with parchment paper.
2. In the heatproof bowl of a stand mixer or in a medium heatproof bowl, whisk together eggs and sugar. Place bowl over a saucepan of simmering water. Cook, whisking occasionally, until an instant-read thermometer registers 110°F (43°C).
3. Carefully move to stand mixer. Using the whisk attachment, beat at high speed until thick, tripled in volume, and ribbon-consistency, 3 to 4 minutes. “Ribbon-consistency” is a common term used to describe the appearance of a batter or mixture. The batter, when falling from the whisk attachment, creates a luxuriously thick ribbon. As the batter from the whisk settles on top of the batter in the bowl, the edges of the “ribbon” should remain clearly defined on the surface for a few moments before slowly disappearing. This ribbon stage tells us that we have whipped enough air into the batter to leaven the cake and are ready to move on to the next step.
4. Gently sift together flour, cornstarch, baking powder, and salt over egg mixture, and gently fold until combined. Transfer 1 cup (75 grams) batter to a small bowl, and stir in melted butter and vanilla until combined. Fold butter mixture into remaining batter just until combined. Divide between prepared pans (about 3⅓ cups or 265 grams each). Sifting ensures all the dry ingredients will evenly distribute in the batter, and carefully folding in the flour mixture, butter, and vanilla at this point is key to a beautiful, airy cake.
5. Bake until golden brown and cake springs back when lightly pressed, 15 to 20 minutes. Let cool completely in pans on wire racks.


Leave a Comment